
Adding a new job in MEPHUB ensures your team can track orders, rentals, and job-specific details all in one place. Follow the steps below to create a new jobsite.
✅ Step 1: Navigate to the Jobsites Page #
- From the top menu, click “Jobsites”
- Then click the “+ Add Job” button on the right
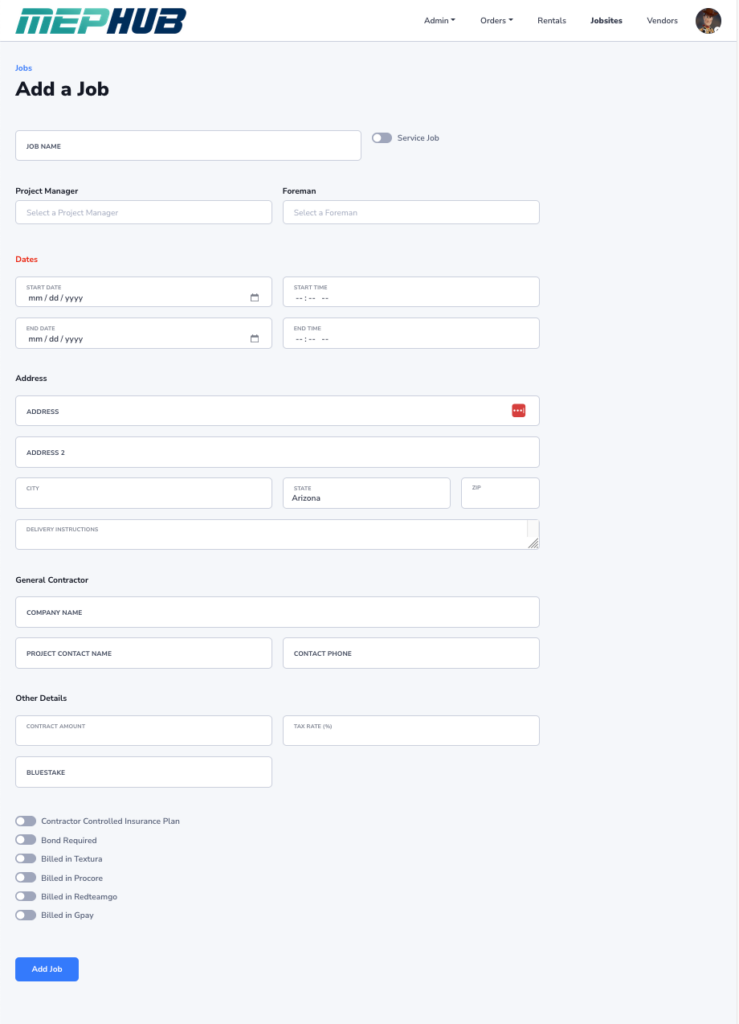
✅ Step 2: Fill Out the Job Details #
Basic Info #
- Job Name — Give your job a clear, descriptive name
- Toggle Service Job ON if applicable
Assign Key Contacts #
- Project Manager — Select the PM from the dropdown
- Foreman — Select the foreman in charge
✅ Step 3: Set the Project Dates #
- Start Date / Time
- End Date / Time (Helpful for scheduling and tracking job timelines)
✅ Step 4: Enter the Jobsite Address #
- Address lines, city, state, and ZIP
- Add Delivery Instructions for material deliveries if needed
✅ Step 5: General Contractor Details #
- Company Name
- Project Contact Name
- Contact Phone Number
✅ Step 6: Add Financial & Permit Info #
- Contract Amount
- Tax Rate (%)
- Bluestake Number
✅ Step 7: Optional Job Flags #
Toggle options as needed:
- Contractor Controlled Insurance Plan (CCIP)
- Bond Required
- Billed in: Textura, Procore, Reateamgo, Gpay
✅ Step 8: Save the Job #
Once everything is filled out, click “Add Job” at the bottom.
Your new job is now active and ready to use. You can immediately start placing orders, tracking rentals, and managing project info.
💡 Pro Tip: #
Complete as many fields as possible upfront — it helps with downstream order creation and vendor communication.